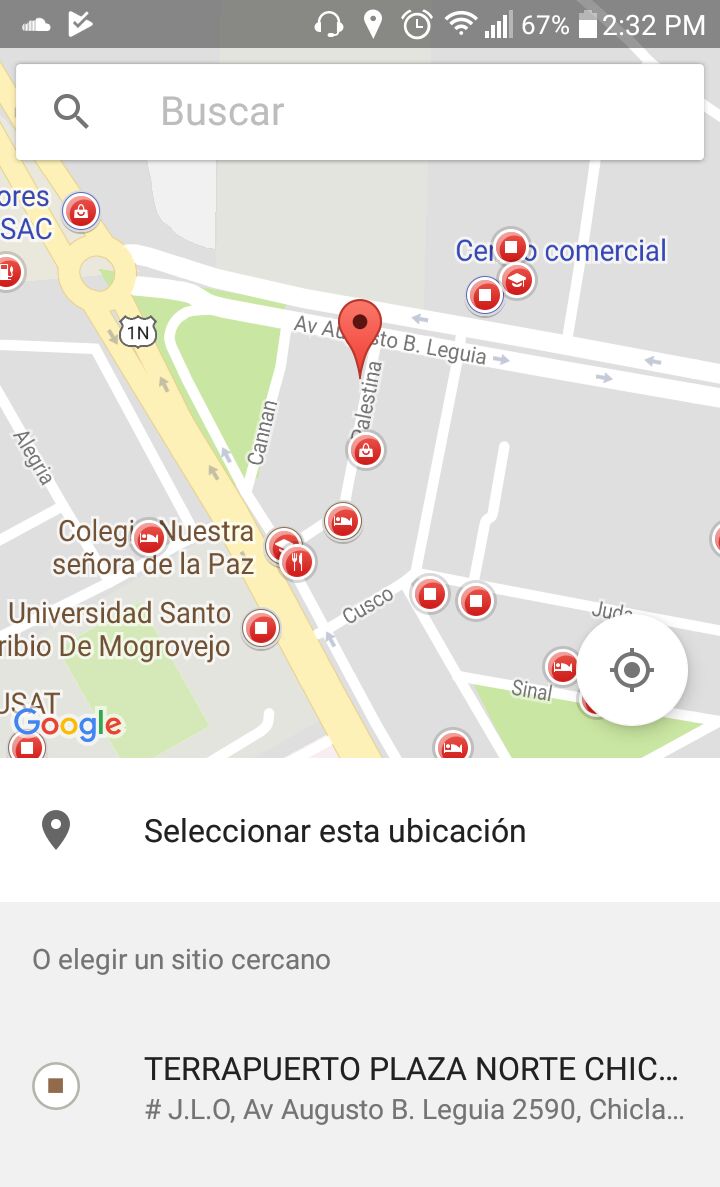
Hoy veremos un tutorial de como implementar un Place Picker , en otras ocaciones pudimos ver tutoriales de como obtener la direccion del google map y luego pasarlo a un textview o guardarlos en una base de datos, si te interesa puedes verlo en los siguientes link:
uno para acceder al Internet y el otro para la ubicación.
<?xml version="1.0" encoding="utf-8"?>
<manifest xmlns:android="http://schemas.android.com/apk/res/android"
package="com.androidmorefast.pc.appenviardiremapbd">
<uses-permission android:name="android.permission.INTERNET"></uses-permission>
<uses-permission android:name="android.permission.ACCESS_FINE_LOCATION"></uses-permission>
<application
android:allowBackup="true"
android:icon="@mipmap/ic_launcher"
android:label="@string/app_name"
android:roundIcon="@mipmap/ic_launcher_round"
android:supportsRtl="true"
android:theme="@style/AppTheme">
<activity android:name=".MainActivity">
<intent-filter>
<action android:name="android.intent.action.MAIN" />
<category android:name="android.intent.category.LAUNCHER" />
</intent-filter>
</activity>
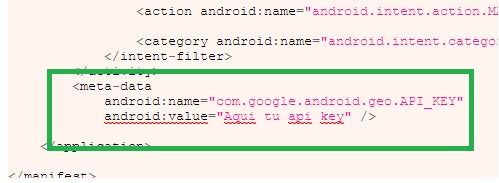
<meta-data
android:name="com.google.android.geo.API_KEY"
android:value="Aqui tu api key" />
</application>
</manifest>
2) Debemos agregar a nuestro build.gradle en dependencies la libreria de play-services
compile 'com.google.android.gms:play-services:7.3.0'
3)Ahora nuestro activity_main
<?xml version="1.0" encoding="utf-8"?>
<android.support.constraint.ConstraintLayout xmlns:android="http://schemas.android.com/apk/res/android"
    xmlns:app="http://schemas.android.com/apk/res-auto"
    xmlns:tools="http://schemas.android.com/tools"
    android:layout_width="match_parent"
    android:layout_height="match_parent"
    tools:context="com.androidmorefast.pc.appenviardiremapbd.MainActivity"
    tools:layout_editor_absoluteY="81dp"
    tools:layout_editor_absoluteX="0dp">

    <ScrollView
        android:layout_width="368dp"
        android:layout_height="495dp"
        tools:layout_editor_absoluteX="8dp"
        tools:layout_editor_absoluteY="8dp">

        <LinearLayout
            android:layout_width="match_parent"
            android:layout_height="wrap_content"
            android:orientation="vertical">

            <TextView
                android:id="@+id/txtLugares"
                android:layout_width="349dp"
                android:layout_height="wrap_content"
                android:text="Hacer click Aqui" />
        </LinearLayout>
    </ScrollView>

</android.support.constraint.ConstraintLayout>
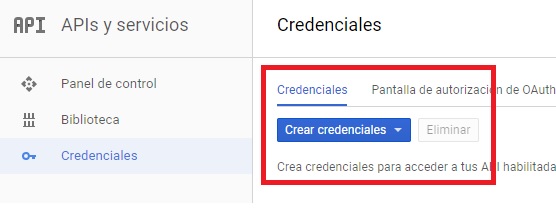
4) crear credenciales, deben ir al siguiente enlace Aquí y habilitar lo que esta en rojo

y deberia quedar de la siguiente forma:

Luego ir al siguiente enlace aqui y crear una nueva credencial
Esa credencial o api key creada debe ir dentro del AndroidManifest
5) Por ultimo el código java
public class MainActivity extends AppCompatActivity {

    private TextView get_place;
    static int PLACE_PICKER_REQUEST=1;
    @Override
    protected void onCreate(Bundle savedInstanceState) {
        super.onCreate(savedInstanceState);

        setContentView(R.layout.activity_main);
        get_place=(TextView)findViewById(R.id.txtLugares);
        get_place.setOnClickListener(new View.OnClickListener() {
            @Override
            public void onClick(View v) {
                PlacePicker.IntentBuilder builder = new PlacePicker.IntentBuilder();
                Intent intent;
                try {
                    intent=builder.build(getApplicationContext());
                    startActivityForResult(intent,PLACE_PICKER_REQUEST);
                } catch (GooglePlayServicesRepairableException e) {
                    e.printStackTrace();
                } catch (GooglePlayServicesNotAvailableException e) {
                    e.printStackTrace();
                }

            }
        });
    }

    protected void onActivityResult(int requestCode, int resultCode,Intent data){
        if (requestCode==PLACE_PICKER_REQUEST){
            if (resultCode==RESULT_OK){
                Place place=PlacePicker.getPlace(data,this);
                String address=String.format("Place %s",place.getAddress());
                get_place.setText(address);
            }
        }
    }
}
Y eso es todo espero les aya gustado.


Hola soy Alex Céspedes fundador de ANDROFAST, programo algunas cosas por diversión, me gusta aprender cosas nuevas y estoy pendiente de todo lo que tenga que ver con tecnología. Este blog lo cree para todas las personas que tengan dificultades en la programación, para ser sincero nunca fui bueno y reprobé algunos cursos de programación, pero mis ganas de aprender pudieron más. SI YO PUEDO TU PUEDES ANIMO!
